Using OneNote Tags
Published: 24 May 2016
Introduction
Tags are a feature of Microsoft OneNote that are often overlooked by users, but which can have out-sized benefits for Business Analysts, students, or others who use OneNote as a tool for gathering notes and information from a variety of sources.
So what are tags you ask? Tags are essentially bits of metadata you can apply to anything inside a OneNote page and which you can then use to find the things you have tagged with a specialized search function. This includes any sort of text (of any size from a single letter in a sentence to multiple paragraphs), images, drawings, and even embedded files.
Tags can also be configured to add custom styling or icons to the content that has been tagged and you can even assign more than one tag to the same bit of OneNote content. However, one limitation is that you can’t apply them to the page, folder, or notebook structures themselves in OneNote. Not sure what that means? See the image below.

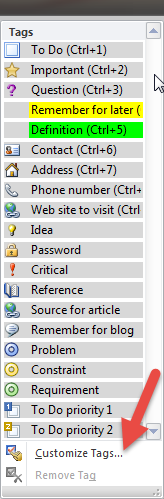
OneNote comes with some tags predefined, and you can use one by selecting the content to be tagged and applying a tag either by selecting it from the tag drop-down list (show below) or by using a tag hot-key combination.

In addition to the tags that come pre-configured with OneNote, you also have the ability to create your own custom tags. This means you can create custom tags for a wide range of purposes.
But the reason why you apply the tags is that once you have content in OneNote that is assigned one or more tags you can then easily bring up a list of those things by tag, quickly hop from one to another, or even copy all of the items with one or more tags from their current location into a new page.
The rest of the article is made up of two sections where I will show you:
- How to customize the tag list, and
- How to use the Tag Summary pane for finding and summarizing tag
- Some thoughts on how to leverage tags as a BA
Customizing the Tag List
To edit the list of current tags or to add your own, follow the steps indicated below:
Step 1
The first thing to do before you modify the tag list is to think about what changes you want to make. If you compare the default tag list to the ones I show below, you may notice immediately is that my Tag list is shorter than yours may be. That’s because I went in and deleted any of the tags I don’t see myself using. This makes the list shorter and more easy to use.
You may also notice that the list also has several custom tags I added. These are:
- Reference
- Problem
- Constraint
- Requirement
You can use these tags along with the To Do, Question, Important, Idea, Definition, and Contact tags during elicitation sessions in order to tag information of the appropriate type.
Although you can create a large number of specific tags, I recommend that you try to keep the number of custom tags you create to a minimum. For example, you could create a custom tag for every stakeholder you are working with and then tag key notes from each stakeholder with their tag. But this is something better done via the Search functionality. The tags you create should be specific, widely usable across all of your analysis work, and of high value.
Step 2
Click the bottom of the tag list scroll bar where shown in the image below:

Step 3
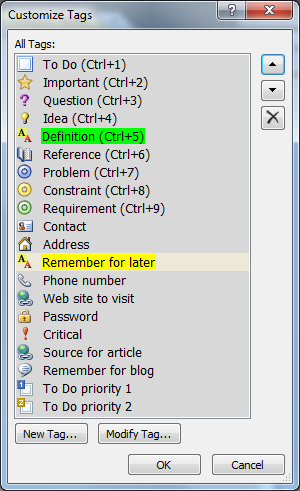
Click the Customize Tags option at the bottom of the list:
This brings up the Customize Tags menu shown below:
Step 4
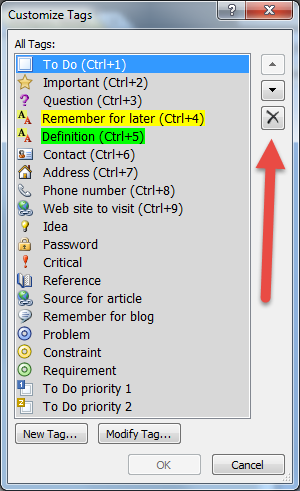
If there are any tags on the list you want to remove entirely, select the tag in the list and then click the delete icon (that looks like an “X”) as shown in the image below:
Step 5
To add a new tag, click the “New Tag” button in the Customize Tags window shown above. This opens the “New Tag” window, shown below:
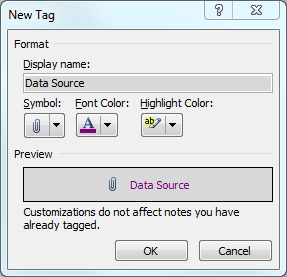
As you can see from the image above, in this window you assign the name you want to give to the tag, an associated symbol (if desired), and any visual cues such as font or highlighting color (again, if desired).
When you click OK you are returned to the Customize Tags window and your new tag now is now active and in the list.
Step 6
Once you have added or removed any tags to your list that you desire, you may want to re-order the tags. This is because the first nine tags, and ONLY the first 9 tags, in the list are automatically assigned hot-keys. These are Ctrl-1 through Ctrl-9 as displayed in the tag list, and as far as I know there is no way to add more hot-keys.
To move a tag up or down the list, just select the tag and use the up or down arrows (indicated in the image below) to change its location in the list.

Finding and Summarizing Tags
Now that you have a number of tags that you can use, the next thing is discuss how you can leverage them. And besides the power of OneNote’s native search capabilities, this where using OneNote can really show its value for Business Analysts.
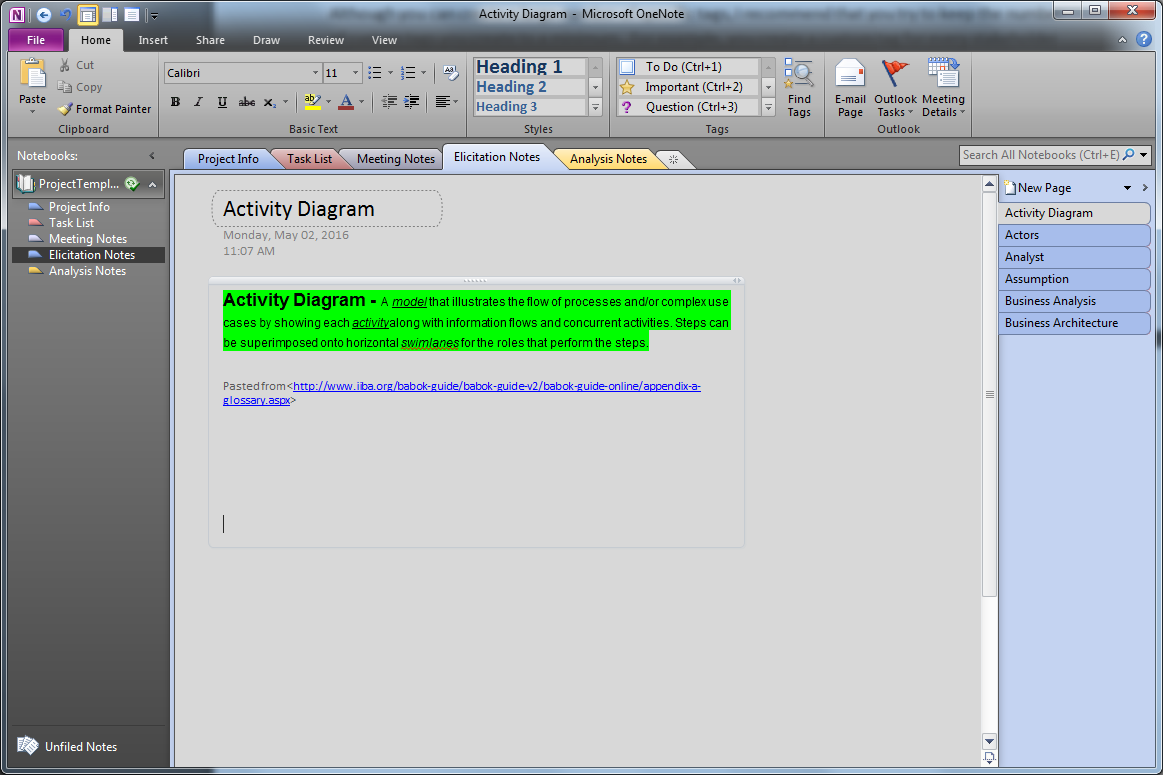
To provide an example, I created a number of pages in a section called Elicitation Notes with a different term and definition (one per page) that I quickly grabbed from the IIBA BABOK v2 Glossary. This will stand in for the notes I may have taken across a number of different elicitation sessions.
As I added a term to a I tagged it with the Definition tag. You can see what that looks like below:
Now to give you some examples of what you do with tags, follow the steps below:
Step 1
Click the Find Tags option in the main menu, shown below:

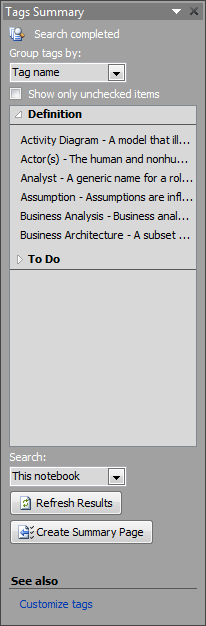
This will open the Tags Summary pane (shown below) in the right side of the application:
Step 2
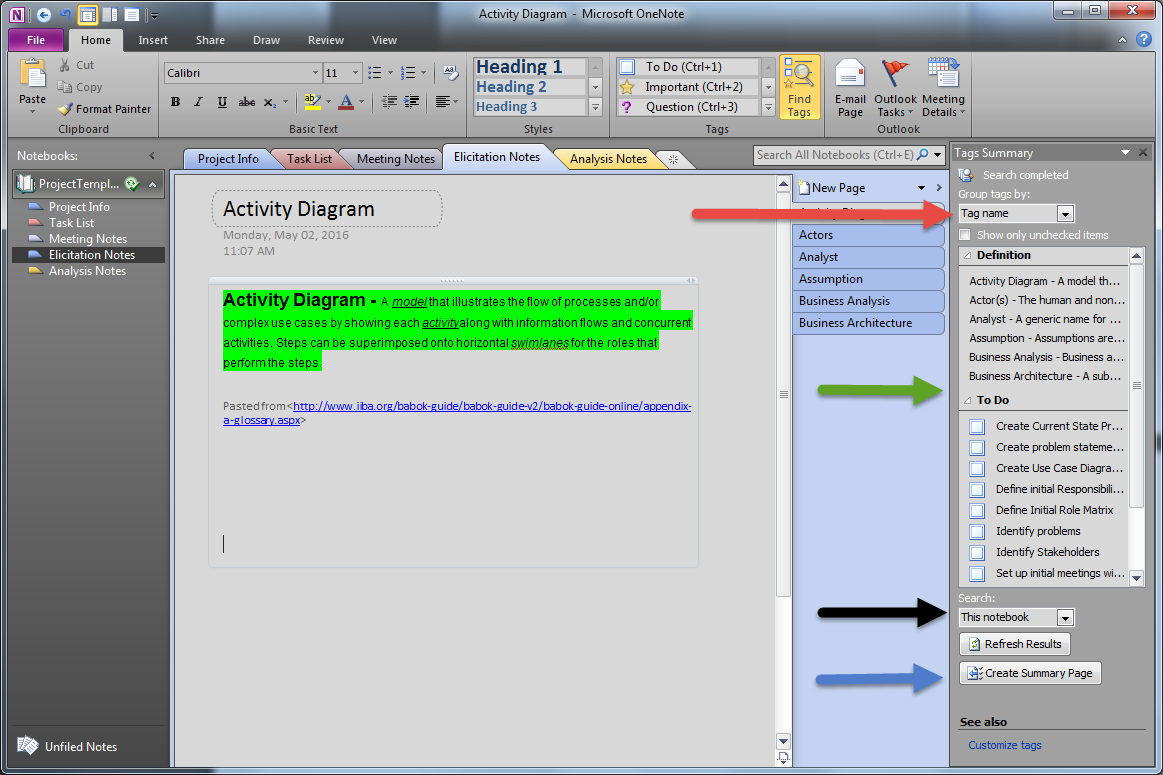
There are four important things to notice about the Tags Summary window. Each is indicated by a different colored arrow in the image below.
Tag Grouping
The red arrow points to the tag grouping option. By default this is by tag name, so you can see that the tag list below (indicated by the green arrow) shows the Definition tags first, then the To Do tags.
You can also choose to sort the tags list by:
- Tag Name [default]
- Section [name]
- Title [of page]
- Date [tag was applied], and by
- Note text [alphabetical sort by the actual text that was tagged]
Tag List
The green arrow points to the tag list results. This is a match of all of the tagged content that meets your current criteria. Clicking on any tag in the list will change the main view to be of the content that was tagged. So if you click the Business Architecture
definition tag you see in the middle of the list, the page currently being viewed will change to the Business Architecture page and the area of the page that is being viewed will be moved so that the text that has the definition tag will be displayed.
Tag Search Range
The black arrow points to the Search option. This controls what content in OneNote is included in the Tags Summary results. By default this is set to “This notebook”, but you can also set it to:
- This Page Group
- This Section
- This Section Group
- This Notebook [default]
- All Notebooks
- Today’s Notes
- Yesterday’s Notes
- This Week’s Notes
- Last Week’s Notes
- Older Notes [than last week]
This becomes very useful if you are looking for information you tagged within one of the time periods provided. Or if you want to limit the tags displayed to just a specific section. We will leverage this function for the next important function that was pointed out above.
Tag Summary Function
Lastly, the dark blue arrow in the image points to the Create Summary Results button. You use this function when you want to all tagged content with one or more specific tags that is perhaps spread across the search area you identified and copy all of it to a single page.
Say I want to create a draft glossary of all of the terms I had identified during my elicitation sessions, which I know I had tagged with the Definition tag. I could use the Tags Summary window to find all of the text with those tags, click on them, and one-by-copy copy the term and definition off to some worksheet.
Or you could just do the following.
- In the Tags Summary pane, click the arrow next to the To Do tags so that the individual tags don’t show (as shown below)
-
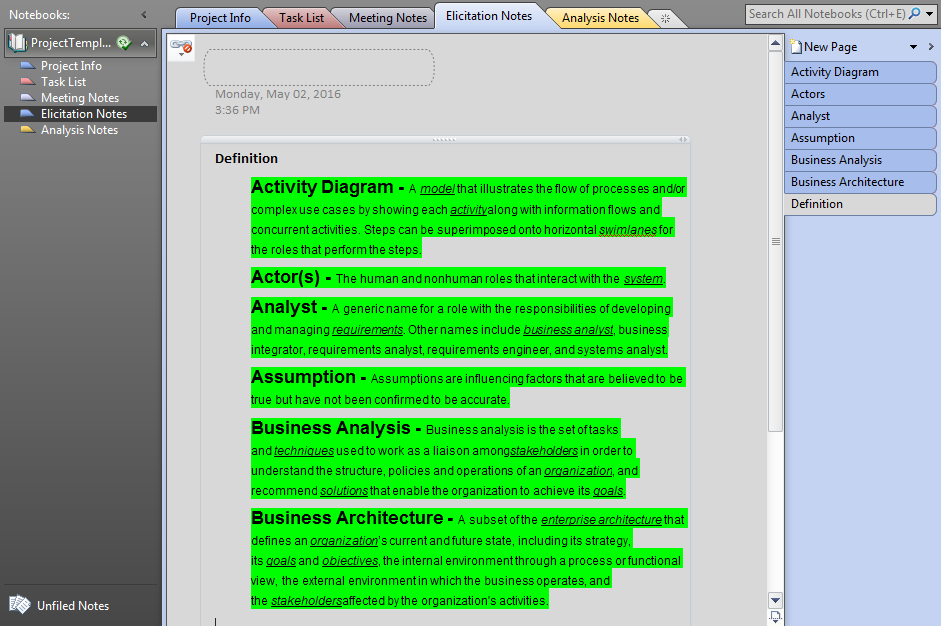
- Click the Create Summary Page button
As a result a new page is created in the current section [aka folder] that you are viewing. The tag title(s) that was summarized are displayed and all of the content associated with that tag is inserted into the page below. You can see what the resulting page would look like in the screen shot below.
Leveraging Tags as a Business Analyst
So how could a BA use the tag functionality? Here are some ideas:
- If you are using a shared notebook, you can tag each item in a OneNote To-Do list with a tag for the individual responsible for that item so that the owners can easily extract them to summary page
- Say you have many meetings during the day (or week, or whenever), if you use OneNote for taking meeting minutes, you can assign the To-Do list tag to any
to-do
items that come up during the meeting and then use the Tag Summary function to extract all of the to-do’s from a range of meeting minutes - Create custom tags for different business units and systems you work with and tag the information that comes from or is about those entities with that tag
- Use tags to identify specific factors identified during elicitation sessions and use the tag find and tag summary functions to help you analyze the information you gathered. Ideas you use might include:
- Tag every term definition you come across with a Definition tag
- Tag every constraint with a Constraint tag
- Tag every item that you need to follow-up on with To Do tag
- Tag every problem you identify with a Problem tab
- Tag every stated requirement with a Requirement tag
- Tag every question that comes up with a Question tag
- Tag every reference system or file you learn about with the reference tag
The power of tags is in the ability to find information quickly, and especially in the ability to summarize
tags that exist across multiple pages, folders, or even notebooks into a single new page.
Please send me an email if you have any feedback or additional ways of using OneNote tags that I haven't covered here.
Thank you.